
Your aircraft engine baffle seal is the most overlooked line item on most annual inspection squawk lists. It shows no red light in the cockpit. It triggers no EFIS alert. Yet a set of cracked, brittle, or missing baffle seals can push cylinder head temperatures deep into the danger zone on the first hot summer day you fly. Now, May is here and the flying season is opening up. This means now is exactly the right time to inspect, understand, and â if needed â replace your engine baffle seals before summer heat does the job for you.
Last Updated: May 7, 2026 | By: The E3 Aviation Editorial Team
Specifically, general aviation owner-operators deal with this every summer. A Cessna 172, a Piper Cherokee, or a Beechcraft Bonanza all depend on a properly sealed baffle system to keep cylinder head temperatures (CHTs) in the safe operating range. When those seals fail, every degree of outside air temperature becomes a direct threat to your engine. Fortunately, baffle seal inspection takes less than 30 minutes with the cowl off. And replacement â one of the most cost-effective maintenance investments you can make â runs $85 to $200 in materials on most GA aircraft.
Additionally, baffle seal maintenance is one area where owner-operators can participate directly in their own aircraft care. You can perform the labor yourself under A&P supervision and cut the cost significantly. This guide covers everything you need to know before summer flying begins.
What Is an Aircraft Engine Baffle Seal?
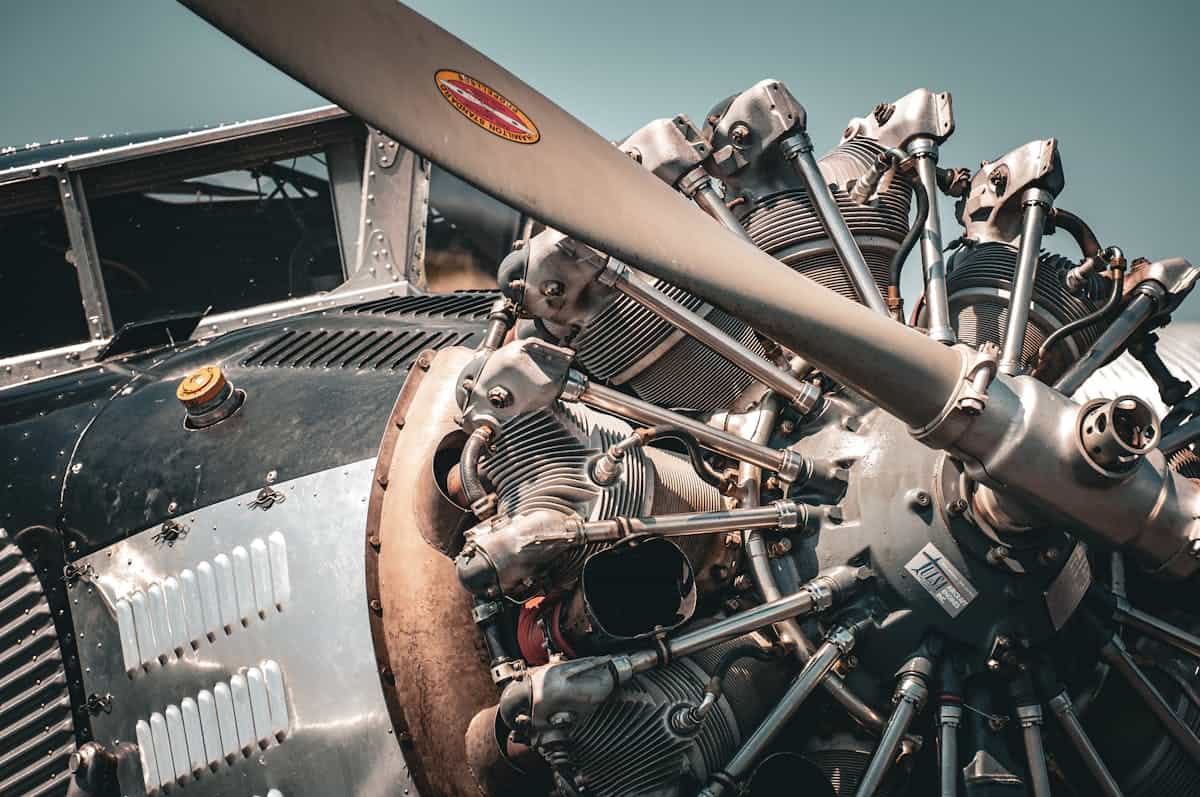
Essentially, baffles are the sheet-metal walls and channels surrounding your piston engine inside the cowling. Their job is to force incoming ram air down and around the cylinders to carry heat away. The aircraft engine baffle seal â typically a strip of rubber, silicone, or neoprene â bridges the gap between the top edge of the aluminum baffles and the inside of your cowl. Without an effective seal, pressurized cooling air escapes past the engine and bypasses the cylinders entirely.
How Engine Baffles Control Cylinder Cooling
Simply put, your engine cooling system runs on a pressure differential. Ram air enters the front of the cowl and builds pressure above the cylinders. Simultaneously, lower pressure exists below the cylinders and at the rear of the cowl. Consequently, this pressure difference forces air down through the fins of each cylinder, pulling heat away from the metal and into the airstream.
Baffle seals maintain that pressure differential by blocking the path of least resistance â the gap between the sheet metal and the cowling. Remove those seals, or let them harden and gap out, and the pressure differential collapses. As a result, air takes the easiest route out of the cowl instead of doing its job across your cylinders. CHTs climb, and they may not stop until something cracks or fails.
Moreover, the failure is rarely uniform. One leaking baffle seal near cylinder No. 3 can push that single cylinder 50â80°F higher than the rest. Without a full multi-probe engine analyzer, you never see it on your panel until the damage is done.
Why Your Aircraft Engine Baffle Seal Matters More in Summer
Every 10°F increase in outside air temperature pushes CHTs proportionally higher. At sea level in summer, ambient temperatures regularly top 90â100°F across most of the country. Consequently, even a properly sealed engine works harder to stay cool. Now add leaking baffle seals to that equation, and you eliminate the system’s only margin. Sadly, many pilots redline at least one cylinder every summer without ever suspecting the baffle seals as the cause.
CHT Limits for Lycoming and Continental Engines
For most Lycoming piston engines, the redline CHT limit sits at 500°F. However, for maximum engine longevity, Lycoming recommends keeping CHTs between 150°F and 400°F during continuous cruise operation. Similarly, Continental engines set the redline at 460°F on most models, with a recommended cruise ceiling of 400°F for best engine life.
Running above 400°F for extended periods accelerates exhaust valve guide wear, promotes cylinder head cracking, and oxidizes engine oil faster than normal. Furthermore, high CHTs rarely affect all cylinders equally. A single compromised baffle seal creates a localized hot spot that a basic single-probe EGT gauge will never reveal. Therefore, installing a full multi-probe digital engine analyzer â systems like the JPI EDM or the Garmin Engine Indication System â is worth every dollar for owner-operators who care about long engine life.
Warning Signs of a Failing Aircraft Engine Baffle Seal
Fortunately, a failing aircraft engine baffle seal gives visible warning before it fails completely. Specifically, watch for the following during your annual or owner-assisted maintenance sessions:
- Stiffness and brittleness: Healthy baffle seal material flexes easily by hand. Stiff, cracking, or crumbling strips can no longer conform to the cowling surface.
- Permanent set: Seals that have folded, bent, or kinked and do not spring back are no longer sealing the gap effectively.
- Torn edges and corners: Small tears at corners and directional changes allow air to escape even when the seal looks intact from above.
- Dust tracks on the cowl interior: Oil-stained streaks of dust on the inside of your cowl panels mark exactly where pressurized air â carrying oil vapor â escapes past a compromised seal.
- Rising CHTs with no other explanation: If you have ruled out fuel flow, ignition timing, and oil quantity, check your baffle seals before anything else.
How to Inspect Aircraft Engine Baffle Seals Step by Step
Inspecting aircraft engine baffle seals requires removing both the upper and lower cowl panels to access the full perimeter of the baffling system. Importantly, this is not a preflight item. Schedule it as part of your annual, during an owner-assisted maintenance session, or any time you notice rising CHTs that you cannot explain. The inspection itself takes about 20â30 minutes once the cowl is off.
What to Look For During Baffle Seal Inspection
First, pull off both cowl panels and set them on a clean, padded surface. Next, run your hand along the full perimeter of the baffle seals, starting at the front of the engine and working systematically backward. Specifically, check the following at each section:
- Press each seal against the cowling surface. It should contact the cowl continuously without gaps, channels, or air paths.
- Flex the seal material at every corner and directional turn. Stiff or cracking material needs replacement regardless of visual appearance from above.
- Inspect the attachment rivets. A loose rivet lets the seal lift off the baffle edge and creates a growing leak path with every flight cycle.
- Look for missing sections. Seals that have broken off or torn away entirely are obvious failures â but they are not always visible without removing the cowl.
- Check the underside of each seal where it contacts the cylinder fins and inter-cylinder baffles. Any gap larger than 1/4 inch is an active cooling problem.
The Dust Track Test: A Simple Leak Detector
Additionally, use the dust track method to find leaks invisible to the naked eye. Before opening the cowl, look carefully at the inside of both cowl panels. Oil-stained streaks of dust and grime are not random contamination. Indeed, each streak marks exactly where pressurized air â and oil vapor â escapes past a compromised seal. Mark each leak location with a grease pencil and then correlate it to the corresponding baffle seal section during inspection.
This technique catches subtle leaks that look fine from the outside but have lost their conforming pressure against the cowl surface. Furthermore, it requires no tools and no disassembly â just 90 seconds and good eyes before you open the cowl for maintenance.
Aircraft Engine Baffle Seal Replacement: Your Options in 2026
Aircraft engine baffle seal replacement ranks among the most rewarding and cost-effective maintenance tasks an owner-operator can undertake. Materials cost $85â$200 depending on material type and aircraft model. A shop typically charges 2â4 hours at A&P labor rates. Alternatively, doing it yourself under A&P supervision cuts the labor cost to near zero. Either way, the investment pays back on the first summer flight when your CHTs hold steady instead of climbing.
Silicone vs. Neoprene: Which Baffle Seal Material Is Best?
Two primary materials dominate the market in 2026: standard neoprene rubber and silicone. Here is how they compare for GA owner-operators:
Standard neoprene (black): This is the OEM material on most factory Cessna, Piper, and Beechcraft aircraft. It works reliably under normal operating temperature ranges. However, it hardens and becomes brittle faster than silicone under sustained high-heat exposure and repeated thermal cycling.
Silicone (red, blue, or orange): Silicone baffle seal material withstands temperatures from -80°F to +425°F. It remains flexible longer than neoprene and shows fewer cracks under sustained thermal cycling. Aircraft Spruce, McFarlane Aviation, and Brown Aircraft Supply all carry silicone baffle seal material in pre-cut kits and roll form for most common GA aircraft types.
Notably, field experience shows that material type matters less than the quality of installation. Fiber-reinforced material â whether silicone or neoprene â consistently outlasts unreinforced strips. Additionally, using high-temperature silicone RTV (500-degree rated, black or red) to fill the base of each seal fills micro-gaps between the seal and the aluminum baffle edge. This one step alone adds years to seal service life.
What Does Aircraft Engine Baffle Seal Replacement Cost?
A complete baffle seal material kit for a Cessna 172 from McFarlane Aviation runs approximately $85â$120. For a Piper Cherokee or Archer, expect a similar range. Pre-cut complete kits from Knots 2U or McFarlane cost slightly more but eliminate measuring and cutting. For a Beechcraft Bonanza, custom material or a full kit from D’Shannon Aviation runs $150â$250 for the seal material alone.
Furthermore, complete replacement baffle kits â new aluminum baffles plus new seals â are available for most common GA aircraft. McFarlane’s powder-coated replacement baffle kits for Cessna aircraft typically run $400â$800. However, for most owner-operators, replacing only the seal material on existing baffles is the correct first step. Save the full baffle kit for aircraft with cracked, bent, or significantly corroded aluminum baffling.
Can You Replace Baffle Seals Yourself? FAR 43 and Owner Rights
Under FAR 43, Appendix A(c), certificated aircraft owners may perform 31 specific preventive maintenance tasks and sign off on their own work. Baffle seal replacement does not appear on that list by name. Therefore, you need an A&P to inspect the completed work and make the required logbook entry. However, most A&Ps welcome owner-assisted maintenance. You perform the labor under their supervision; they inspect, approve, and sign off. This keeps everything legal while cutting your cost significantly.
Additionally, participating in your own maintenance builds hands-on familiarity with your aircraft that no amount of reading can match. You learn where the leaks are. You understand exactly how the cooling system works. As a result, you fly with a level of confidence that comes only from knowing what you checked.
Step-by-Step Baffle Seal Replacement Process
The following process applies to most single-engine GA aircraft with Lycoming or Continental piston engines. Always consult your aircraft maintenance manual for model-specific procedures and hardware specifications before beginning any work.
- Remove both cowl panels and photograph the existing baffle seal layout before touching anything. This gives you a reference for material routing and overlap at corners and joints.
- Drill out the old rivets using a #40 drill bit. Then peel back the old seal material. Inspect the aluminum baffle edge underneath for corrosion or cracks before installing new material.
- Cut new material using the old seals as templates. Add 10â15% extra length at corners to allow for proper overlap. Fiber-reinforced material cuts cleanly with heavy scissors or aviation snips.
- Clean the baffle surface with acetone or MEK to remove oil residue. New rivets and RTV need a clean bonding surface to hold properly.
- Apply 500-degree silicone RTV along the baffle edge before positioning the new seal. This step fills micro-gaps between the seal base and the aluminum and is critical for a lasting seal.
- Rivet the seals in place using new AN-469 rivets at the spacing specified in your maintenance manual â typically every 2â3 inches.
- Reinstall the cowl panels and verify that each seal contacts the cowling surface continuously along its full length. Any gap larger than 1/8 inch needs additional material, a shim, or extra RTV.
After completing the work, have your A&P inspect the installation and log the entry. Then fly the aircraft and monitor CHTs closely over the first several flights. Typically, owner-operators see a 10â25°F CHT reduction across all cylinders after a complete baffle seal replacement on an aircraft with worn seals.

Beyond the Seals: Complete Baffle System Inspection Checklist
A fresh engine baffle seal delivers its full benefit only when the entire baffling system is in good shape. Additionally, leaking Scat tubing, missing inter-cylinder baffles, and a stuck alternate air door all degrade engine cooling â even with brand-new seal material installed. Therefore, inspect every component of the baffling system whenever you have the cowl off.
Scat Tubes, Alternate Air Doors, and Baffling Hardware

Specifically, check each of the following components as part of a complete baffling system inspection:
- Inter-cylinder baffles: Small sheet-metal fins between cylinders direct airflow across the cylinder fins. Bent, cracked, or missing inter-cylinder baffles create hot spots on individual cylinders. Replace any that show damage.
- Scat tubing: Flexible Scat tubing carries alternate air, cabin heat, and defrost air throughout the engine compartment. Collapsed, cracked, or kinked Scat tubes restrict airflow and disrupt the pressure differential. Replace any tube that has lost its full round cross-section.
- Alternate air door: The alternate air door on fuel-injected engines provides unfiltered induction air if the main filter clogs. A door that sticks open draws warm air from inside the cowl, disrupting the pressure differential and raising all CHTs. Verify the door closes completely and springs shut firmly when released.
- Baffle attachment hardware: Check every bolt, nut, and bracket securing the aluminum baffles to the engine and accessory case. A loose baffle vibrates, cracks at attachment points, and eventually fails â taking the seals with it.
- Cowl alignment: A cowl that sits slightly off-center compresses the baffle seals unevenly. One side seals while the other leaks. Verify even contact around the full perimeter after reinstalling both panels.
Furthermore, document everything you find. Take photos before and after every maintenance session. Track seal condition at each annual so your A&P can monitor degradation over time. Generally, on coastal or humid-climate aircraft, seal material lasts three to four years. On dry-climate aircraft, the same installation can last six to eight years. Knowing your aircraft’s individual history lets you plan proactive replacement â before the seals fail on a hot day at a destination with no A&P within 50 miles.
Frequently Asked Questions: Aircraft Engine Baffle Seal
How often should I inspect my aircraft engine baffle seal?
Inspect baffle seals at every annual inspection and replace any section that shows stiffness, cracking, permanent set, or visible gaps. In practice, most GA aircraft need new seal material every three to five years. However, aircraft in hot, humid coastal environments degrade faster than those based inland. Therefore, track condition at each annual rather than replacing on a fixed schedule â your aircraft’s individual history is the best guide.
Can I fly with damaged baffle seals?
Technically, you may fly legally if the aircraft otherwise qualifies as airworthy. Damaged baffle seals do not automatically constitute an unairworthy condition under the FARs. However, flying with compromised seals risks CHT exceedances that cause permanent engine damage. Moreover, exceeding the manufacturer’s CHT limits violates operating limitations on most type-certificated aircraft. The cost of new seal material is trivial next to the cost of a top overhaul or cylinder replacement. Fix the seals.
Do I need an A&P to replace my baffle seals?
Yes. Baffle seal replacement does not appear on the FAR 43 Appendix A(c) list of owner preventive maintenance tasks. Consequently, you need an A&P to inspect and sign off the completed work. Nevertheless, owner-assisted maintenance â performing the labor under A&P supervision â is standard practice in the GA community. Most mechanics welcome it. It cuts your total cost and builds your knowledge of your own aircraft at the same time.
What is the best baffle seal material for a hot-climate aircraft?
Silicone baffle seal material handles sustained heat and thermal cycling better than standard neoprene. Specifically, for aircraft based in Arizona, Texas, Florida, or other high-heat states, silicone rated to +425°F outlasts standard neoprene by a meaningful margin. Additionally, fiber-reinforced silicone resists tearing at corners and rivet points far better than unreinforced strip material. McFarlane Aviation’s Cowl Saver silicone baffle seal product is widely trusted throughout the GA owner community.
Will new baffle seals lower my CHTs?
In most cases, yes. Aircraft with worn or missing seals typically see a 10â25°F CHT reduction across all cylinders after a complete replacement. The improvement depends on how badly the seals leaked and how many cylinders ran above optimal temperature. Furthermore, on aircraft without full-engine monitoring, the improvement may not show up on a basic EGT gauge â another strong reason to upgrade to a multi-probe digital engine analyzer at the same time.
How do I know if my baffle seals are causing high CHTs?
First, rule out the other common causes: fuel mixture setting, ignition timing, oil level, and airspeed in the climb. Next, pull the cowl and inspect every inch of seal material by hand â not just by eye. Additionally, look for dust tracks on the cowl interior. Each streak identifies a specific leak point. If you find multiple sections of stiff, cracked, or gapped seal material, a baffle seal replacement is the right starting point before any deeper engine troubleshooting.
Related Articles

E3 Aviation Editorial Team
The E3 Aviation Association editorial team is made up of licensed pilots, aviation educators, and industry professionals dedicated to advancing general aviation safety, community, and education. Learn more about E3 Aviation.
Sources
- Aviation Consumer â Engine Baffle Seals: Worth Replacing
- Kitplanes Magazine â Replacing Baffle Seals
- McFarlane Aviation â Baffle Seal Repair Kit
- AFR Enterprises â Mastering Aircraft Engine Baffling for Optimal Cooling Efficiency
- Aviation Safety Magazine â Managing CHTs
- Cessna Flyer Association â Engine Management 101: Understanding Cylinder Baffling
- D’Shannon Aviation â Engine Cooling Baffle Kit Solutions
- Brown Aircraft Supply â Silicone and Neoprene Engine Baffles
- FAA â Maintenance Aspects of Owning Your Own Aircraft (P-8740-15)
Want to go deeper on GA aircraft ownership and maintenance? Visit E3 Aviation Association’s aviation articles archive for guides covering everything from annual inspection prep to avionics upgrades. And if you learn better by watching, subscribe to the E3 Aviation YouTube channel for hands-on GA content delivered straight to your feed.
