
Soaring in Circles: Mastering Holding Patterns in Aviation | A Comprehensive Guide
Navigating the Sky’s Traffic Jams with Precision and Confidence
In the intricate world of aviation, where every flight demands precision and adaptability, holding patterns in aviation stand out as a vital skill. Essentially, these racetrack-shaped paths allow pilots to manage air traffic congestion, weather delays, or unexpected disruptions while keeping aircraft safely separated. Whether you’re a seasoned aviator navigating a busy airspace or an enthusiast curious about aerial maneuvers, understanding holding patterns is key to appreciating aviation’s complexity. Consequently, this guide dives deep into the essence of holding patterns in aviation, exploring their purpose, detailed entry procedures, and practical tips to help you soar through the sky’s traffic jams with confidence and grace.
What Are Holding Patterns in Aviation?

Simply put, holding patterns in aviation are predefined, oval-shaped flight paths that aircraft follow when directed by air traffic control (ATC). Often compared to traffic circles on the ground, they serve as temporary holding zones in the sky. According to the FAA’s Aeronautical Information Manual (AIM), these patterns anchor to a specific navigational fix—like a VOR, NDB, or GPS waypoint—and ensure aircraft remain within a designated airspace while awaiting clearance.
Moreover, holding patterns are standardized to maintain order and safety. Typically, they consist of two straight legs connected by 180-degree turns, forming a racetrack shape. For example, the AIM specifies that turns are usually made at a standard rate of 3 degrees per second, ensuring consistency across flights. Importantly, these patterns help ATC manage complex scenarios, from sequencing arrivals at busy airports to delaying aircraft during adverse weather.
Technical Aspects of a Standard Holding Pattern
A standard holding pattern is detailed with precision to ensure pilots understand both the depiction and the execution. In still-air conditions, the ground track forms a clear racetrack shape, anchored at a holding “fix.” This fix can be a VOR, NDB, radial/DME fix, or a designated waypoint. Alternatively, it may be the aircraft’s current position as computed by the Flight Management System (FMS).
Key Technical Details Include:
- Turns: After entering the hold, all turns in a standard pattern are made to the right. Pilots are expected to achieve an average bank angle of at least 25˚ or maintain a rate of turn of 3˚ per second, whichever necessitates the lesser bank.
- Legs: The inbound leg follows the assigned radial or bearing to the fix. Meanwhile, the outbound leg is adjusted for wind conditions to smoothly intercept the inbound track.
- Timing: Inbound timing is one minute when at or below 14,000 feet and one and a half minutes when above this altitude.
When ATC provides clearance with a specified departure time from the holding fix, pilots should adjust their flight pattern to comply as closely as possible, while remaining within the standard pattern parameters. This precision maintains efficiency and safety, underscoring the critical role of holding patterns in modern aviation.
What is a Holding Fix According to the FAA Pilot/Controller Glossary?
A holding fix is a specific point that pilots use to determine and maintain the position of their aircraft while in a holding pattern. This point can be identified through navigational aids (NAVAIDs) or by visual landmarks visible from the air.
When air traffic controllers instruct pilots to hold at a particular fix, they rely on these points to ensure the aircraft remains in the correct airspace and follows the prescribed flight path. Holding fixes are crucial for managing traffic flow, particularly in busy airspace or during varied weather conditions.
In summary, a holding fix acts as a reliable anchor for aircraft, helping pilots align with navigation systems or ground-based references to maintain orderly and safe air operations.
A hold procedure, as outlined by the FAA Pilot/Controller Glossary, is a specific maneuver that pilots perform to maintain an aircraft within a designated airspace. This maneuver is typically used while the aircraft waits for further instructions from air traffic control.
The procedure involves flying in a predetermined pattern, often a racetrack shape, ensuring the aircraft remains in a specific area. The primary purpose of this is to manage traffic efficiently and safely, especially in busy or congested airspaces.
According to Merriam-Webster, a holding pattern refers to an aerial maneuver where an aircraft flies in a typically oval-shaped path while waiting for permission to proceed, particularly to land. This holding pattern allows planes to maintain altitude and location in the sky until they receive clearance for the next step in their journey.
Purposes Behind Holding Patterns
Several situations can trigger a holding pattern, each reflecting aviation’s dynamic nature:
- Air Traffic Congestion: During peak hours at hubs like Atlanta or Chicago, ATC uses holding patterns to sequence aircraft, preventing runway overload.
- Weather Disruptions: Thunderstorms, heavy snow, or fog can reduce visibility or close runways, requiring aircraft to hold until conditions improve.
- Unplanned Events: Runway maintenance, emergency landings, or equipment malfunctions may force temporary holds.
- Fuel Adjustments: Occasionally, aircraft hold to burn excess fuel if they exceed maximum landing weight, ensuring a safe approach.
For instance, during a snowstorm, ATC might stack multiple planes in holding patterns at different altitudes, creating a vertical queue. Similarly, the NTSB Aviation Accident Database notes cases where holding patterns prevented collisions during unexpected runway closures, underscoring their safety role.
How to Enter a Holding Pattern: A Detailed Step-by-Step Guide
Entering a holding pattern requires precision, situational awareness, and adherence to ATC instructions. Below, we break down the process comprehensively, with expanded details on the critical entry phase, drawing from the FAA Airplane Handbook and Boldmethod.
1. Receive Instructions from ATC

Initially, pilots receive holding instructions via radio from ATC. These include:
- The holding fix: A navigational point like a VOR or waypoint (e.g., “Hold at the XYZ VOR”).
- The radial or bearing: Defines the holding course (e.g., “Hold southwest on the 230 radial”).
- The turn direction: Right or left turns, based on airspace needs.
- The leg length: Typically 1 minute at or below 14,000 feet, or a distance in nautical miles above that altitude.
In addition to these basic instructions, ATC provides further crucial details to ensure safe navigation and compliance:
- DME distances: If Distance Measuring Equipment (DME) is in use, ATC specifies the distances at which turns should commence. This might be phrased as “hold between [number of miles] and [number of miles].” In the absence of specific outbound DME instructions, pilots follow standard holding pattern timing procedures.
- Altitude or Flight Level (FL): Pilots are instructed on the altitude or flight level to maintain during the holding pattern, ensuring separation from other aircraft.
- Expect Further Clearance (EFC) Time: ATC will also provide a time when pilots can expect further instructions or an approach clearance. This is crucial in cases of a communications failure, providing a clear timeline for pilots to adhere to.
For example, ATC might say: “Cessna 123, hold east of the DEF VOR on the 090 radial, right turns, 1-minute legs, expect further clearance at 1430 Zulu.” Consequently, pilots must note these details accurately to set up the maneuver.
These comprehensive instructions are vital for maintaining order and safety in the skies, allowing pilots to execute holding patterns with precision.
When navigating missed approach holding patterns, pilots can typically expect to receive a set of clear instructions from the published approach charts. Here’s what these instructions generally include:
- Initial Heading or Course: Once a missed approach is initiated, the pilot is directed to follow a specific heading or course. This ensures the aircraft is on the correct path while transitioning away from the runway.
- Altitude Assignment: Pilots are informed of the altitude to climb to after the missed approach has been initiated. This is critical to ensure safe separation from other aircraft and obstacles.
- Holding Procedure Details: If required, the holding pattern is described in detail, including the location (a designated fix) and any specific entry or holding directions.
Although many missed approaches contain these elements, not all procedures end with a holding pattern. For example, some approaches like the ILS, RNP, and GPS at certain airports might direct a missed approach without requiring a hold, thus providing flexibility based on the current air traffic situation.
In most cases, if there are any deviations from the published procedure, Air Traffic Control (ATC) will provide updated instructions to ensure safety and efficiency. Being familiar with these components helps pilots confidently execute a missed approach if the need arises.
When air traffic control (ATC) issues a departure time from a holding fix, pilots should fine-tune their flight path within the allowable holding pattern. The goal is to ensure the aircraft departs the fix as close as possible to the designated time. To achieve this, pilots might:
- Adjust Speed: Modulate the aircraft speed to shorten or extend the time spent in the holding pattern.
- Modify Turn Radius: Alter the tightness of the turns to effectively manage time in the loop.
- Vary Timing: Change the duration of straight segments to better align with the specified departure time.
Making these adjustments precisely allows for a smooth transition from the hold while keeping the schedule as directed by ATC.
To abbreviate a holding procedure clearance when it’s already charted, you don’t need to include all the published details. Instead, you can simply instruct the aircraft to hold at the designated point according to the details already provided in the charts. For example, you might say: “Proceed to OLLNO, hold as charted, maintain Flight Level 120. Anticipate clearance for approach at 2215Z.”
This streamlined method allows you to omit redundant information while ensuring the pilot has all necessary instructions, as the published charts already specify the holding pattern requirements.
2. Prepare the Aircraft
Next, adjust the aircraft for holding. Specifically, reduce speed to the FAA-recommended holding maximum:
- 200 knots for propeller-driven aircraft below 6,000 feet.
- 230 knots for jets between 6,000 and 14,000 feet.
- 265 knots above 14,000 feet.
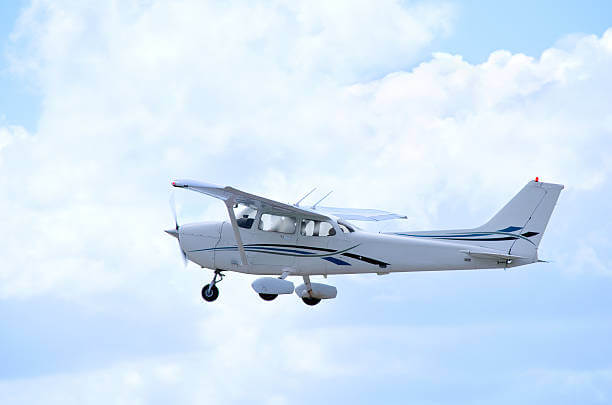
Additionally, configure flaps or landing gear if needed to maintain stability at lower speeds. For instance, a Cessna 172 might slow to 100 knots with 10 degrees of flaps, ensuring maneuverability during tight turns.
When it comes to the International Civil Aviation Organisation‘s (ICAO) guidelines on maximum holding speeds, they vary depending on the altitude of the aircraft. Here’s a breakdown of these speeds:
- At or Below 14,000 Feet: The maximum speed is set at 230 knots indicated airspeed (KIAS).
- Above 14,000 Feet to 20,000 Feet: Aircraft can hold at speeds up to 240 KIAS.
- Above 20,000 Feet to 34,000 Feet: The speed limit increases to 265 KIAS for higher efficiency.
- Above 34,000 Feet: At this altitude, the limit is expressed in Mach numbers, specifically Mach 0.83.
Handling Necessary Speed Increases: Pilot Protocol
When flying, encountering situations where higher airspeeds become necessary is not uncommon. Pilots must take the following steps if such conditions arise:
- Immediate Notification: Alert Air Traffic Control (ATC) right away if operating speeds exceed the designated limits due to unavoidable circumstances, such as turbulence.
- Return to Specified Speeds: Once it’s safe and the need for increased speed no longer exists, adjust the aircraft’s speed back to or below the recommended limits.
- Update ATC: After resuming standard speeds, notify ATC of the adjustment, ensuring they’re aware of the aircraft’s current status.
By adhering to this protocol, pilots maintain safety and clear communication with ATC, optimizing flight operations.
Additionally, for holding patterns limited to Category A and B aircraft, the speed should not exceed 170 KIAS. These guidelines ensure safe and efficient air traffic management at various flight levels.
3. Determine the Entry Type
Before reaching the fix, pilots must choose an entry based on their heading relative to the holding course. The FAA defines three standard entries, each designed to align the aircraft efficiently with the pattern. Here’s a detailed breakdown:
Calculating Holding Pattern Entries for Pilots
Pilots often find themselves needing to determine how to enter a holding pattern effectively—a key skill for safe and efficient flight. While tools like aviation apps and calculators can aid decision-making, pilots should primarily rely on their ability to calculate entries using air traffic control (ATC) information. This skill ensures they maintain control and situational awareness in the cockpit.
Entry Types Explained
- Direct Entry
- Simplest of the three, pilots can transition directly into the hold upon reaching the fix.
- Ideal when the aircraft’s initial heading leads directly into the holding course.
- Teardrop Entry
- After reaching the fix, the pilot adjusts the heading by approximately 30 degrees from the inbound course.
- The aircraft is then flown outbound for a set time or distance before turning inbound to join the hold.
- Parallel Entry
- When employing this method, the aircraft initially flies outbound parallel to the holding course.
- Once a specific distance or timing is achieved, the pilot executes a turn to re-intercept the holding course inbound.
Key Considerations
- Flexibility Over Requirements: While these entries form a standard framework, they aren’t regulatory. Pilots have the discretion to choose based on the aircraft’s position relative to the holding fix.
- Protected Airspace: Although flexible, it’s crucial for pilots to understand that these patterns are designed within protected airspace parameters, ensuring safety through appropriate speeds and distances.
- Quick Mental Math: To execute these entries effectively, pilots should develop the ability to quickly assess and decide, making use of navigation instruments without diverting focus from essential flight operations.
By mastering these entry techniques, pilots optimize both safety and efficiency in various flight scenarios, ensuring they adapt quickly to changes without depending solely on external digital aids.
Direct Entry
First, the direct entry applies when the aircraft’s heading is within 70 degrees of the holding course. For example, if holding on the 090 radial (east) and approaching from 020 to 160 degrees, fly directly to the fix and begin a standard rate turn in the specified direction.
Importantly, this entry is straightforward but requires precise timing. Upon crossing the fix, initiate a 3-degree-per-second turn (e.g., right turns take about 60 seconds to complete 180 degrees at 180 knots). Then, proceed outbound for the specified leg length before turning inbound.
Teardrop Entry
Alternatively, the teardrop entry is used when the aircraft’s heading falls within 110 degrees of the reciprocal of the holding course. For a hold on the 090 radial (east), this applies if approaching from 160 to 270 degrees.
Specifically, upon reaching the fix, turn 30 degrees away from the holding course in the opposite direction of the pattern’s turns. For right turns on the 090 radial, turn left to a heading of 060 degrees. Next, fly outbound for 1 minute (or as instructed), then make a 210-degree right turn to intercept the inbound course (090). This teardrop shape ensures a smooth transition, especially in strong winds.
For clarity, imagine approaching the DEF VOR from 180 degrees. After crossing the fix, turn left to 060, fly for 1 minute, then turn right to 090, joining the pattern seamlessly.
Parallel Entry
Finally, the parallel entry applies when the aircraft’s heading is outside the direct or teardrop sectors—typically within 110 degrees of the holding course on the non-holding side. Using the 090 radial example, this occurs if approaching from 270 to 020 degrees.
Upon reaching the fix, turn toward the holding course (e.g., right to 090) and fly parallel to it for 1 minute. Then, turn left 180 degrees to outbound, followed by another left turn to intercept the inbound course. Although more complex, this entry avoids overshooting the pattern in tight airspace.
For instance, approaching from 360 degrees, turn right to 090, fly parallel for 1 minute, then turn left to 270 outbound, and left again to 090 inbound. This method requires careful navigation but ensures alignment.\
When navigating missed approach holding patterns, pilots can typically expect to receive a set of clear instructions from the published approach charts. Here’s what these instructions generally include:
- Initial Heading or Course: Once a missed approach is initiated, the pilot is directed to follow a specific heading or course. This ensures the aircraft is on the correct path while transitioning away from the runway.
- Altitude Assignment: Pilots are informed of the altitude to climb to after the missed approach has been initiated. This is critical to ensure safe separation from other aircraft and obstacles.
- Holding Procedure Details: If required, the holding pattern is described in detail, including the location (a designated fix) and any specific entry or holding directions.
Although many missed approaches contain these elements, not all procedures end with a holding pattern. For example, some approaches like the ILS, RNP, and GPS at certain airports might direct a missed approach without requiring a hold, thus providing flexibility based on the current air traffic situation.
In most cases, if there are any deviations from the published procedure, Air Traffic Control (ATC) will provide updated instructions to ensure safety and efficiency. Being familiar with these components helps pilots confidently execute a missed approach if the need arises.
Understanding a Hold-in-Lieu-of Procedure Turn
A hold-in-lieu-of a procedure turn is a crucial maneuver in aviation, especially when it comes to executing precise approaches without radar assistance. Here’s everything you need to know:
What is it?
When aircraft need to change direction to align with an airport’s approach path and radar guidance isn’t available, a hold-in-lieu-of procedure turn is performed. This maneuver allows pilots to reverse course effectively, ensuring a seamless entry into the approach path.
Why is it Necessary?
In situations where radar vectoring isn’t available, pilots rely on navigational skills and charts. The hold-in-lieu-of procedure facilitates this by providing a standardized method of making a 180-degree turn, particularly in instrument flight rules (IFR) conditions. It ensures that the aircraft can intercept and follow the prescribed approach path correctly.
When is it Used?
Whenever the procedure is depicted on an approach chart, pilots are required to execute it. These charts map out specific conditions and locations where a hold-in-lieu-of procedure turn is necessary, helping pilots maintain regulatory compliance and safety.
Key Points to Remember:
- Depicted on Charts: It’s only required when shown on the approach chart.
- Instrument Flight Rules (IFR): Mostly used in IFR conditions when visual references may be limited.
- Safety and Precision: Enhances navigational accuracy and flight safety during approach.
By ensuring pilots can reliably perform a 180-degree course reversal, this procedure plays a fundamental role in aviation safety and efficiency.
Understanding Entry Procedures for Non-Standard Holding Patterns
When navigating non-standard holding patterns, pilots encounter a distinct approach compared to standard patterns. The key difference lies in the direction of the turns within the pattern:
- Non-standard holding patterns require left turns, deviating from the more common right turns in standard patterns.
To properly orient themselves, pilots must consider the orientation of the holding side relative to the 70˚ line. This orientation helps in visualizing the entry procedure:
- Mirror Image Effect: The entry diagram for a non-standard holding pattern is essentially a mirror image of that used for a standard pattern. This reflects the change in turn direction and assists pilots in adjusting their approach accordingly.
- Procedural Adjustments: Pilots need to adapt their entry techniques to account for this reverse orientation, ensuring they align correctly with the holding area’s parameters.
By understanding these differences, pilots can effectively manage airspace and adhere to procedures tailored for non-standard holding patterns.
4. Execute the Entry
Once the entry type is determined, fly to the fix and initiate the maneuver. Consistently, use standard rate turns to maintain the pattern’s shape. Moreover, adjust for wind drift—e.g., steepen turns into the wind—to keep the racetrack symmetrical.
5. Maintain Altitude and Airspeed
After establishing the pattern, maintain the assigned altitude (e.g., 5,000 feet) and holding speed. Frequently, pilots must monitor altimeters and airspeed indicators to stay within tolerances, especially in turbulent conditions.
6. Manage Time or Distance Legs
Lastly, managing the outbound and inbound legs is critical to maintaining the holding pattern’s integrity. Depending on ATC instructions, pilots base this on either time or distance, with each method requiring precise execution to ensure the aircraft returns to the fix accurately. Here’s an in-depth exploration of this step, tailored to both novice and experienced pilots.
Timed Legs
Primarily, timed legs are standard at or below 14,000 feet, as per the FAA’s AIM. Typically, pilots fly outbound for 1 minute (or as specified by ATC) before turning inbound. However, timing begins at a specific point—when the aircraft is abeam the fix during the outbound turn. For example, in a right-turn hold on the 090 radial, start the timer as the wings level outbound on a heading of 270 degrees. Next, fly for 1 minute, then initiate a 180-degree standard rate turn back to the inbound course (090 degrees). Importantly, this assumes a no-wind scenario, but real-world conditions complicate matters.
When considering inbound timing, it’s crucial to adjust based on altitude:
- At or below 14,000 feet: The inbound leg should be timed for one minute.
- Above 14,000 feet: Extend the inbound leg timing to one and a half minutes.
These adjustments help ensure that holding patterns are flown accurately, taking into account the altitude-specific guidelines. Remember, these are standard times and may be adjusted by ATC based on traffic and weather conditions. Understanding and applying these principles ensures safe and efficient navigation during holding patterns.
For instance, consider a 20-knot headwind on the outbound leg (heading 270). Because the wind slows groundspeed, the 1-minute outbound leg might not extend far enough from the fix, resulting in a shortened inbound leg. To compensate, pilots extend the outbound time—say, to 1 minute and 15 seconds—so the inbound leg, aided by a tailwind, aligns with the fix after the turn. Conversely, a tailwind on the outbound leg requires shortening the time (e.g., 45 seconds) to avoid overshooting. According to Boldmethod, a rule of thumb is to adjust outbound time by 2-3 seconds per knot of wind component, ensuring symmetry.
Distance Legs:
Alternatively, above 14,000 feet or when equipped with Distance Measuring Equipment (DME) or GPS, pilots may use distance-based legs. Commonly, ATC specifies a leg length in nautical miles (e.g., “4-mile legs”). For example, holding east of a VOR on the 090 radial with DME, fly outbound until reaching 4 nautical miles from the fix, then turn inbound. Similarly, GPS-equipped aircraft can waypoint the turn points, ensuring precision.
DME in Holding Patterns
DME holding is integrated into standard holding procedures with a key difference: distances replace time values to define the holding pattern limits. An ATC clearance will specify the DME distance from the navigation aid where the inbound and outbound legs are to be terminated. The completion of each leg is determined by DME indications rather than elapsed time.
For aircraft equipped with Flight Management Systems (FMS), a pilot might receive clearance to hold at a defined waypoint on a specified track with a specific leg distance expressed in nautical miles. This provides an alternative for navigating holding patterns with precision.
Impact of Wind on Distance-Based Legs
However, wind affects distance legs too. Specifically, a headwind on the outbound leg reduces groundspeed, requiring a longer outbound heading to reach the prescribed distance. For a Cessna 172 at 100 knots with a 20-knot headwind, groundspeed drops to 80 knots, extending the time to cover 4 miles from 2 minutes to 2.5 minutes. Conversely, a tailwind increases groundspeed, shortening the time. To illustrate, at 120 knots groundspeed (100 knots airspeed plus 20-knot tailwind), 4 miles takes just 2 minutes. Thus, pilots must calculate groundspeed using wind data from preflight briefings or onboard systems like ADS-B.
By understanding these elements, pilots can effectively incorporate DME into holding patterns, ensuring both safety and precision in their navigation.
However, wind affects distance legs too. Specifically, a headwind on the outbound leg reduces groundspeed, requiring a longer outbound heading to reach the prescribed distance. For a Cessna 172 at 100 knots with a 20-knot headwind, groundspeed drops to 80 knots, extending the time to cover 4 miles from 2 minutes to 2.5 minutes. Conversely, a tailwind increases groundspeed, shortening the time. To illustrate, at 120 knots groundspeed (100 knots airspeed plus 20-knot tailwind), 4 miles takes just 2 minutes. Thus, pilots must calculate groundspeed using wind data from preflight briefings or onboard systems like ADS-B.
Wind Correction Techniques: Additionally, wind impacts turn geometry. For instance, a crosswind from the north in a right-turn hold on the 090 radial pushes the aircraft south, elongating the pattern unless corrected. To counter this, steepen the outbound turn (e.g., 4 degrees per second) into the wind and shallow the inbound turn (e.g., 2 degrees per second). Alternatively, adjust headings—crab into the wind outbound (e.g., 280 instead of 270) and inbound (e.g., 080 instead of 090)—to maintain the racetrack’s shape. The FAA AIM emphasizes these adjustments for protected airspace compliance.
Practical Example: Imagine holding at 5,000 feet with a 1-minute leg and a 15-knot wind from 360 degrees. Outbound on 270, the headwind slows you, so extend to 1 minute 10 seconds. Turning inbound on 090, the tailwind speeds you up, but the prior adjustment ensures you hit the fix. Meanwhile, crab 5-10 degrees north on both legs to counter the crosswind. This precision keeps the pattern tight and predictable for ATC.
Tools and Monitoring: Furthermore, use a stopwatch, GPS timer, or FMS to track legs. Regularly cross-check position with the fix—VOR needles should center inbound, and DME should read zero at the fix. If off course, adjust subsequent legs (e.g., shorten outbound if overshooting). Finally, communicate with ATC if unsure, as they may amend instructions based on radar observations.
When navigating missed approach holding patterns, pilots can typically expect to receive a set of clear instructions from the published approach charts. Here’s what these instructions generally include:
- Initial Heading or Course: Once a missed approach is initiated, the pilot is directed to follow a specific heading or course. This ensures the aircraft is on the correct path while transitioning away from the runway.
- Altitude Assignment: Pilots are informed of the altitude to climb to after the missed approach has been initiated. This is critical to ensure safe separation from other aircraft and obstacles.
- Holding Procedure Details: If required, the holding pattern is described in detail, including the location (a designated fix) and any specific entry or holding directions.
Although many missed approaches contain these elements, not all procedures end with a holding pattern. For example, some approaches like the ILS, RNP, and GPS at certain airports might direct a missed approach without requiring a hold, thus providing flexibility based on the current air traffic situation.
In most cases, if there are any deviations from the published procedure, Air Traffic Control (ATC) will provide updated instructions to ensure safety and efficiency. Being familiar with these components helps pilots confidently execute a missed approach if the need arises.
Expected Procedures for Pilots Under Instrument Flight Rules (IFR) in a Holding Pattern
When flying a holding pattern under Instrument Flight Rules (IFR), pilots are required to meticulously follow specific procedures to ensure safety and maintain separation from other aircraft. Here’s what these procedures typically include:
- Speed Management: Pilots must adhere to prescribed speed limits while flying in the holding pattern. These limits can vary based on altitude and aircraft type but are essential for maintaining safe separation and reducing the likelihood of conflicts.
- Hold Entry Methods: Entering a holding pattern involves specific entry methods, depending on the aircraft’s direction of approach. Familiar methods like the direct, parallel, or teardrop entry must be executed accurately to seamlessly integrate into the holding pattern.
- Timing and Distance: Pilots need to manage the timing of the holding pattern, usually flying standard one-minute legs on each side of the pattern. Proper timing helps maintain the aircraft within protected airspace and ensures a predictable movement that air traffic control can manage effectively.
- Rate of Turn: Pilots are expected to make turns at a standard rate, which usually means a rate of one degree per second. This consistency ensures that all aircraft within the holding pattern move in a predictable manner.
These procedures are designed to utilize the protected airspace effectively, ensuring that the holding pattern operates smoothly and that aircraft remain safely separated from each other. Following these procedures is crucial for maintaining order and safety in congested airspace, enabling pilots and air traffic control to manage traffic efficiently.
In summary, managing time or distance legs blends science and art. By mastering timing, distance, and wind corrections, pilots ensure holding patterns in aviation remain safe and efficient.
How Do Instrument-Rated Pilots Maintain Currency in Holding Procedures?
Instrument-rated pilots must adhere to specific requirements to keep their qualifications up-to-date, particularly concerning holding procedures.
Regulatory Standards
Under FAA regulations, specifically Part 61.57(C), pilots need to demonstrate their proficiency in holding procedures regularly.
Routine Check-In
Pilots must successfully complete these procedures every six months. This ensures they remain familiar with and capable of executing the tasks essential for safe flying under instrument flight rules.
What Are the Tasks?
Holding procedures involve a set of skills such as correctly entering and maintaining the hold as specified by air traffic control. Pilots should also be adept at executing standard and non-standard entry procedures.
Why Maintain Currency?
Staying current helps ensure both the safety of the flight and compliance with federal requirements. It also aids pilots in maintaining their skills in challenging weather conditions where such procedures become crucial.
By following these guidelines, instrument-rated pilots can ensure their skills and certifications remain valid and effective.
>Upon exiting the holding pattern, it’s important to make a notification, even though there’s no need to mention the time or altitude during this check-in.
These steps are part of maintaining clear communication and ensuring safety while in the air.
Mastering Holding Patterns in Aviation: Expert TipsBeyond procedures, mastering holding patterns demands practical strategies:
- Prioritize Communication: Regularly confirm instructions with ATC to avoid misunderstandings.
- Stay Flexible: Adapt to shifting weather or traffic demands—e.g., shortening legs if directed.
- Track Fuel: Calculate burn rates (e.g., 10 gallons/hour in a Cessna) and request priority if reserves dwindle.
- Keep Calm: Maintain composure under pressure, relying on training.
- Plan Ahead: Visualize the pattern before entry to reduce in-flight workload.
- Use Avionics: Leverage GPS or FMS, but practice manual skills for redundancy.
For additional insights, explore Aviation Safety Magazine.
Common Mistakes and Avoidance Strategies
Even experienced pilots err. Here’s how to sidestep pitfalls:
- Misheard Instructions: Repeat back ATC directives for clarity.
- Incorrect Entry: Double-check heading and fix position with charts.
- Timing Errors: Use a stopwatch or GPS timer for precision.
Technology’s Role
Today, FMS and GPS simplify holding, automating entries and leg timing. However, the FAA AIM emphasizes retaining manual proficiency.
For more E3 Aviation resources, visit: https://e3aviationassociation.com.
Depiction of Arrival Holding Patterns on STAR Charts</h3>
Arrival holding patterns on Standard Terminal Arrival Route (STAR) charts are represented in a unique manner for easy identification and pilot guida
nce.
These holding patterns appear as thin lines on the charts. This design choice highlights that holding patterns are not an obligatory part of the procedure. Pilots should only execute these holds when given explicit instructions by Air Traffic Control (ATC).
The use of thin lines effectively distinguishes holding patterns from mandatory route lines or other critical elements, ensuring clarity. While multiple holding patterns can be present on a STAR chart, such as the WESAT arrival into Fort Worth, TX, their depiction always adheres to these standardized conventions.
holding patterns in aviation, aviation holding procedures,
how to enter a holding pattern, direct entry holding pattern, teardrop entry holding pattern,
parallel entry holding pattern, pilot holding tips, ATC holding instructions, managing holding pattern legs, wind correction in holding patterns
What Defines a Non-Standard Holding Pattern?
A non-standard holding pattern is distinctive due to certain key features that deviate from the usual guidelines used in aviation.
- Left Turns: Unlike standard holding patterns, which require right turns, non-standard patterns involve making all turns to the left.
- Unique Timing: The timing for the inbound leg may differ from the conventional standards commonly used.
Generally, unless you’ve received direct instructions from Air Traffic Control (ATC) to the contrary, or you’re following a specific chart indicating a non-standard procedure, you should default to executing right turns, adhering to the standard holding pattern.